Using ABViewer, it is possible to create a section view of a 3D model. Its set of tools enables to add section planes, adjust their position and measure both external and inner elements of a 3D model. When you open a 3D file, the Viewer 3D tab with all its options is automatically activated.
How to create a section view of a 3D model?
To create a section view of your 3D model, you need to add a section plane and adjust its position.
1. Open your file and position the 3D model as needed in the working space.
2. Add a section plane. To do this, you need to click ![]() . A section plane and gizmo - an element to adjust section planes - will be added to the model space. When the mouse is over the gizmo, its handles are highlighted. To rotate the plane, hover the cursor over the handle and rotate the plane in the desired direction.
. A section plane and gizmo - an element to adjust section planes - will be added to the model space. When the mouse is over the gizmo, its handles are highlighted. To rotate the plane, hover the cursor over the handle and rotate the plane in the desired direction.
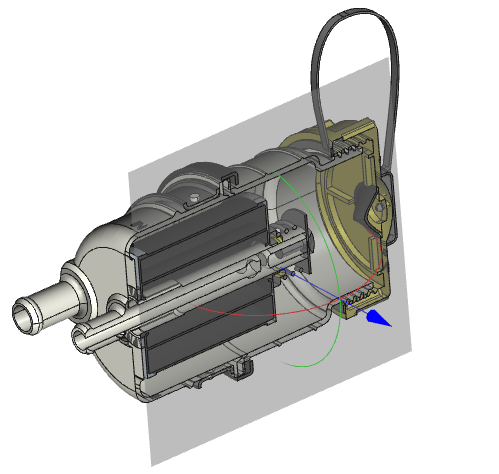

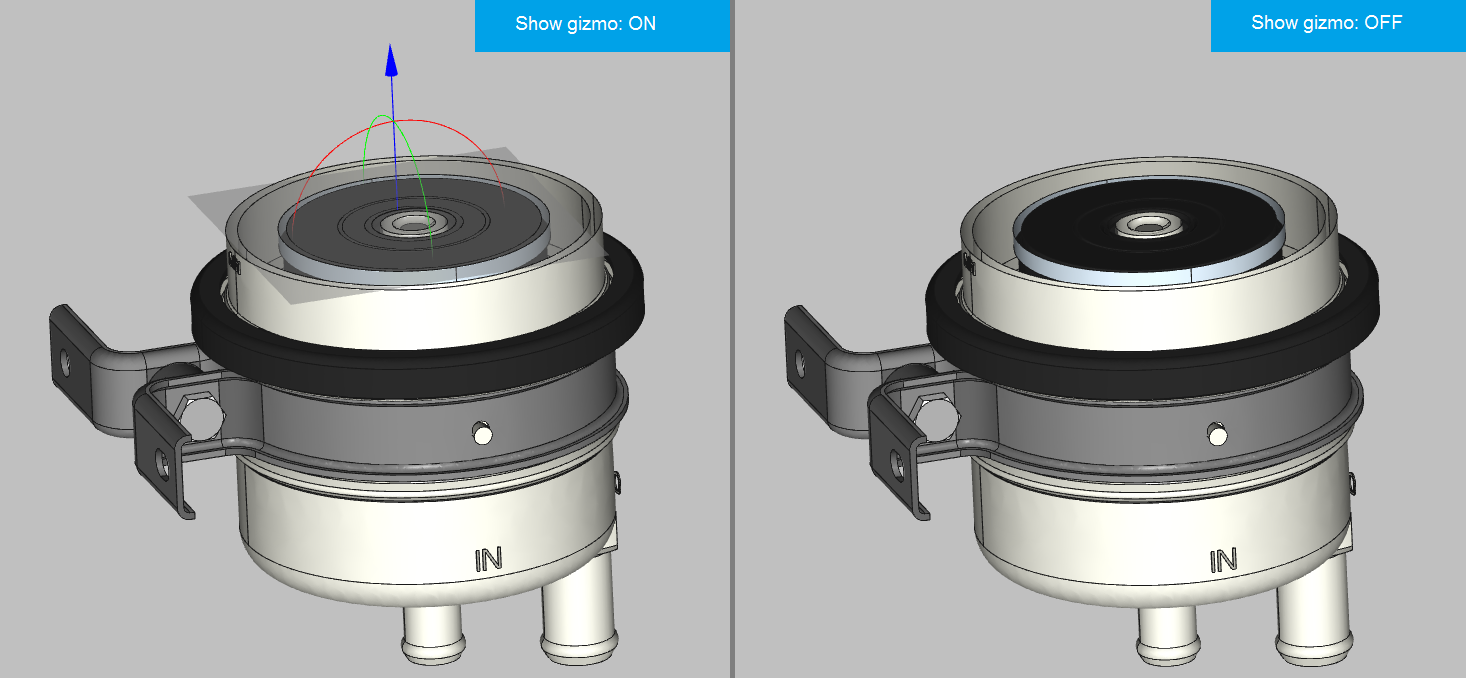
After adding the section plane, a clipped part of the 3D model is displayed. To hide/show the gizmo and the section plane, use the Show Gizmo option.
How to change the section plane position?
After adding the section plane, you can adjust its position in the 3D model space. It will help to find a better display view.
1. To change the section plane position, move the cursor over one of the gizmo’s handles. After it changes the color, press the left mouse button and move the cursor in the desired direction. When you rotate the plane, the rotation angle will be displayed as a colored sector.
2. You can set the plane’s position using the following parameters:
•By three points. Specify three points on the model.
•By select entity. Select an entity on the model through which the section plane will pass.
•Change the base point. Specify the base point of the plane.
It is also possible to specify the precise values of the parameters in the 3D Section window by changing the parameter values, thereby changing the plane position.
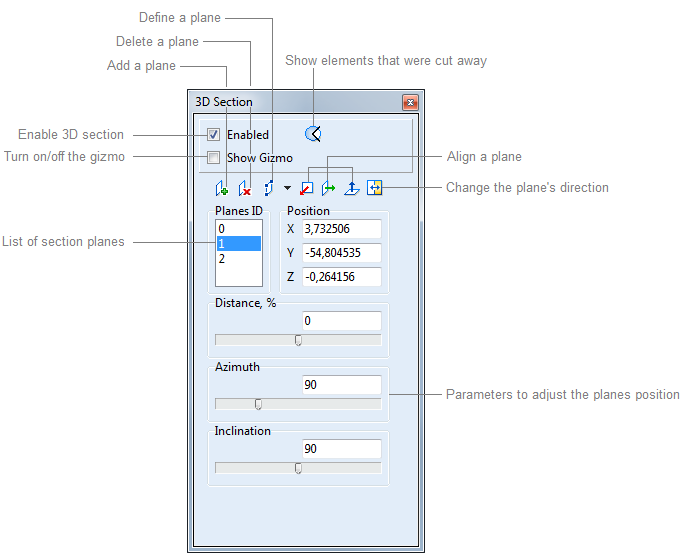
The 3D Section pane includes options, settings and controls of section planes, model parts and visual controls.
How to create a section view of a 3D model using several planes?
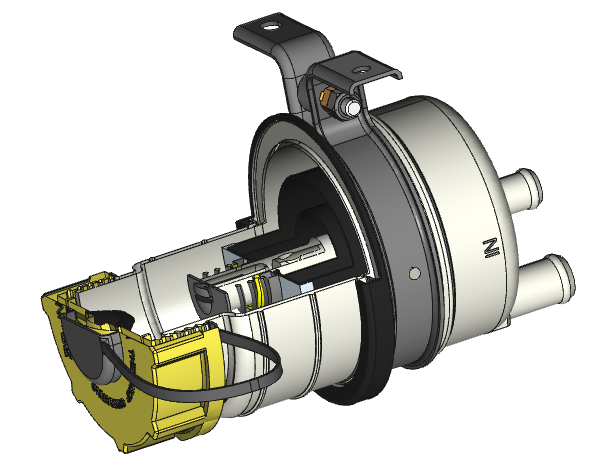
To cut a model part as it is shown in the figure below, you need to add two planes.
1. Add the first plane and adjust its position. To adjust the position, you can move the gizmo’s handles, specify the coordinates or use the additional parameters – Distance, Azimuth, Inclination.
2. Add the second plane and adjust its position.
3. Turn on the option that will display all the elements that were cut away by the section planes.
How to change the 3D model display style?
To customize the display visual style, use the options on the Visual Styles pane of the Viewer 3D tab. By default, the Edges and Smooth shading modes are activated.
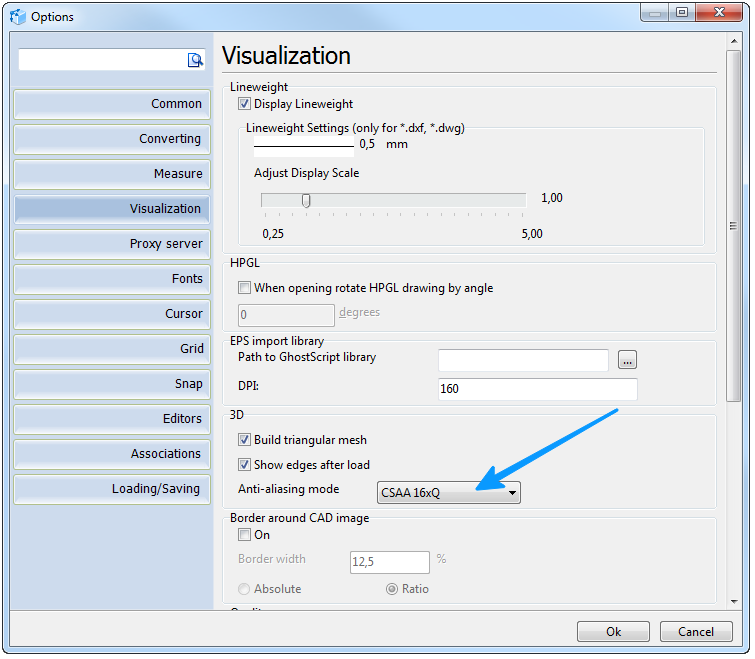
How to use the anti-aliasing mode?
You can change the anti-aliasing mode in the Options window. Go to File -> Options -> Visualization -> 3D and select the anti-aliasing mode you need in the dropdown list.
Go to ABViewer